Sunday, February 3, 2013
Move over busy schedule – It's Movie Time, brought to you by General Mills.
Now we know that a family night out might feel impossible right now. Whether it's preparing for the holidays or managing the kid's busy schedules, it can be difficult to find time to get out of the house for some family fun. Well, General Mills is willing to make it easier to catch the latest blockbuster just by eating their delicious cereal!
For a limited time enjoying a night out at the movies is as simple as enjoying your favorite cereals from General Mills. With the recent releases of Breaking Dawn – Part II and Wreck-It-Ralph, it's time to spread the word that you can all go to the movies for free.
Here's how it works:
For a limited time (11/08/2012 – 12/06/2013) you can receive a free movie ticket when you purchase two specially marked packages of General Mills cereals including Cheerios, Cinnamon Toast Crunch, Lucky Charms, Trix, Cocoa Puffs, Golden Grahams, and Reese's Peanut Butter Puffs.
After purchasing two participating cereals, visit www.generalmills.com/moviecash to enter the unique code found inside each box of cereal and print-off your free Movie Cash certificate (good for one admission of up to a $12 value at participating theaters). To find a participating movie theater in your area log onto: www.emoviecash.com/dis_locator/
Movie coupon redemption site: www.generalmills.com/moviecash
Find a participating theater: www.emoviecash.com/dis_locator/
Friday, January 25, 2013
Score Big with a Homemade Pizza for the Big Game
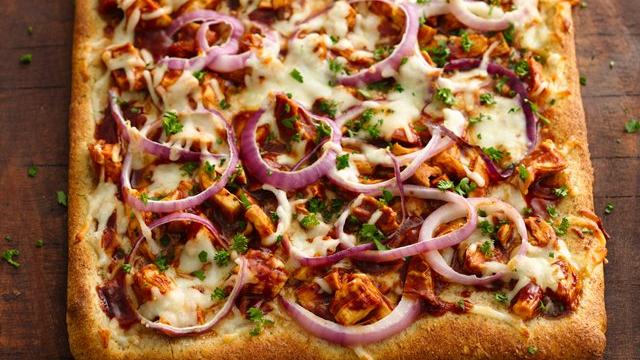
The Big Football Game is one of the best days of the year to get together with friends and enjoy some delicious food. Build the ultimate game day “Snackadium” this year with plenty of great BIG GAME snack options from Pillsbury. From Bacon Cheddar Pinwheels to the perfect Football Pizza, make sure it’s one Big Game that you and your friends will want to share.
And while you’re thinking about Football Pizza, our new Pillsbury Artisan Pizza Crust with Whole Grain is the perfect option for that M.V.P. performance. Just add your favorite, crowd-pleasing ingredients and in minutes you’ll have a fan favorite pizza that everyone will enjoy!
With 16 grams of whole grain per serving, it’s a great Big Game option
Now available in the refrigerated section of your local grocery store
Quick, convenient, and completely customizable, the new Pillsbury Artisan Pizza Crust with Whole Grain will help you add that extra pizzazz to any Football party. Plus, with the health benefits of whole grain, it’s a guaranteed touch down! So go ahead and create your personal pizza creation and add a homemade option to this year’s party spread. It’ll be a guaranteed winner.
Check out some of our recipe ideas on our website: http://bit.ly/VleqXy
Download a printable coupon for $1.50 off one package of the new Pillsbury Artisan Pizza Crust with Whole Grain - http://bit.ly/UmJkOg
Pillsbury.com
Your gift pack will contain:
• FREE coupon for Pillsbury Artisan Pizza Crust with Whole Grain
• Football cutting board
• Pizza pan
• Pizza cutter
An additional gift pack will be available to share with family and friends, or possibly a blog reader.
Please note that it is very important that you disclose.
"Disclosure: The product, gift pack, information, and additional sample have been provided by Pillsbury through MyBlogSpark."
Sunday, May 1, 2011
Art-Full Horizons: Zutter Make N Takes & a Giveaway!!
Art-Full Horizons: Zutter Make N Takes & a Giveaway!!: "We are so excited to have Zutter as our Platinum Sponsor for Art-Full Horizons!!!!! Laura, Donna, and I have all worked with Zutter fo..."
Tuesday, April 5, 2011
Southern Pecan Chicken Salad
Makes 12 servings

8 cups chopped cooked chicken
2 cups halved red seedless grapes
1 1/4 cups toasted chopped pecans
1/2 cup chopped green onion
10 slices bacon, cooked and crumbled
1 1/2 cups mayonnaise
1 cup sour cream
2 tablespoons Dijon mustard
1 tablespoon chopped fresh thyme
1 1/4 teaspoons salt
1 teaspoon ground black pepper
Croissants
1. In a large bowl, combine chicken, grapes, pecans, green onion, and bacon.
2. In a separate bowl, combine mayonnaise, sour cream, mustard, thyme, salt, and pepper. Combine mayonnaise mixture with chicken mixture. Cover, and refrigerate until ready to serve. Serve on croissants.
Makes 12 servings

8 cups chopped cooked chicken
2 cups halved red seedless grapes
1 1/4 cups toasted chopped pecans
1/2 cup chopped green onion
10 slices bacon, cooked and crumbled
1 1/2 cups mayonnaise
1 cup sour cream
2 tablespoons Dijon mustard
1 tablespoon chopped fresh thyme
1 1/4 teaspoons salt
1 teaspoon ground black pepper
Croissants
1. In a large bowl, combine chicken, grapes, pecans, green onion, and bacon.
2. In a separate bowl, combine mayonnaise, sour cream, mustard, thyme, salt, and pepper. Combine mayonnaise mixture with chicken mixture. Cover, and refrigerate until ready to serve. Serve on croissants.
Sunday, April 3, 2011
Stampin' Up! Spring Is Blossoming Promotion!
http://www.stampinup.net/esuite/home/thetaleofstampin/promotions

Spring is Blossoming Promotion: April 1 - 30, 2011
The Stampin' Up! Spring is Blossoming Promotion offers customers the opportunity to purchase two sneak peek products from the upcoming 2011-2012 Idea Book & Catalog. You can get these brand-new products in one of two ways:
1) Online Order
Spend $20* on any Stampin' Up! products and become eligible to purchase both the Four Frames Set and Paisley Petals Designer Series Paper.
Both items can be purchased once the $20 minimum is met; there is a limit of five per product once the $20 minimum is met. Ordering another $20 of Stampin' Up! products resets the limit and allows you to purchase another five Designer Series Papers and/or stamp sets.
2) Host a Workshop
Host a $350* workshop and get the Four Frames Set and Paisley Petals Designer Series Paper for FREE! Email me for details if you would like to place a combined order with friends or place a single order thru me to earn these products free!
There is a limit of one Four Frames Set and Paisley Petals Designer Series Paper per workshop.
*Net sales before tax and shipping

Starting on April 1, 2011 until supplies run out.
You can grab yourself a Mystery Grab Bag.
Grab Bags come in (3) different sizes
$5.00 Grab Bag 125873
Price: $5.00
Grab a bag of Stampin’ Up! products! The $5 Grab Bag contains at least $20 worth of discontinued products, including any combination of products like the following: ribbons, Accents & Elements, chipboard, Designer Series Paper, or Simply Sent kit components. Grab bags do not contain stamp sets or tools.
$10.00 Grab Bag 125874
Price: $10.00
Grab a bag of Stampin’ Up! products! The $10 Grab Bag contains at least $40 worth of discontinued products, including any combination of products like the following: ribbons, Accents & Elements, chipboard, Designer Series Paper, or Simply Sent kit components. Grab bags do not contain stamp sets or tools.
$15.00 Grab Bag 125875
Price: $15.00
Grab a bag of Stampin’ Up! products! The $15 Grab Bag contains at least $60 worth of discontinued products, including any combination of products like the following: ribbons, Accents & Elements, chipboard, Designer Series Paper, or Simply Sent kit components. Grab bags do not contain stamp sets or tools.
Each Grab bag will a variety of Stampin Up! Discontinued items that could include:
Ribbon
Accents & Elements
Chipboard
Designer paper
Simply Sent kit components
**NO Stamp sets or Tools will be included in grab bags **
No Minimum purchase required and No limit to the number of grab bags to purchase
**Grab bags sales are final and there are no refunds or exchanges**
Use the following Item number/s above when adding them to your order starting today .
http://www.stampinup.net/esuite/home/thetaleofstampin/promotions

Spring is Blossoming Promotion: April 1 - 30, 2011
The Stampin' Up! Spring is Blossoming Promotion offers customers the opportunity to purchase two sneak peek products from the upcoming 2011-2012 Idea Book & Catalog. You can get these brand-new products in one of two ways:
1) Online Order
Spend $20* on any Stampin' Up! products and become eligible to purchase both the Four Frames Set and Paisley Petals Designer Series Paper.
Both items can be purchased once the $20 minimum is met; there is a limit of five per product once the $20 minimum is met. Ordering another $20 of Stampin' Up! products resets the limit and allows you to purchase another five Designer Series Papers and/or stamp sets.
2) Host a Workshop
Host a $350* workshop and get the Four Frames Set and Paisley Petals Designer Series Paper for FREE! Email me for details if you would like to place a combined order with friends or place a single order thru me to earn these products free!
There is a limit of one Four Frames Set and Paisley Petals Designer Series Paper per workshop.
*Net sales before tax and shipping

Starting on April 1, 2011 until supplies run out.
You can grab yourself a Mystery Grab Bag.
Grab Bags come in (3) different sizes
$5.00 Grab Bag 125873
Price: $5.00
Grab a bag of Stampin’ Up! products! The $5 Grab Bag contains at least $20 worth of discontinued products, including any combination of products like the following: ribbons, Accents & Elements, chipboard, Designer Series Paper, or Simply Sent kit components. Grab bags do not contain stamp sets or tools.
$10.00 Grab Bag 125874
Price: $10.00
Grab a bag of Stampin’ Up! products! The $10 Grab Bag contains at least $40 worth of discontinued products, including any combination of products like the following: ribbons, Accents & Elements, chipboard, Designer Series Paper, or Simply Sent kit components. Grab bags do not contain stamp sets or tools.
$15.00 Grab Bag 125875
Price: $15.00
Grab a bag of Stampin’ Up! products! The $15 Grab Bag contains at least $60 worth of discontinued products, including any combination of products like the following: ribbons, Accents & Elements, chipboard, Designer Series Paper, or Simply Sent kit components. Grab bags do not contain stamp sets or tools.
Each Grab bag will a variety of Stampin Up! Discontinued items that could include:
Ribbon
Accents & Elements
Chipboard
Designer paper
Simply Sent kit components
**NO Stamp sets or Tools will be included in grab bags **
No Minimum purchase required and No limit to the number of grab bags to purchase
**Grab bags sales are final and there are no refunds or exchanges**
Use the following Item number/s above when adding them to your order starting today .
Tuesday, December 28, 2010
Giveaway

Now onto the HUGE blogiversary candy(S). Hold onto your hats everyone. It truly is MASSIVE and you are gonna want to win!!!
I've had so many wonderful companies that I have worked with over the past 2 years donate prizes so I've gotta mention them first.
My Favorite Organizer EVER!!! A 36" Ribbon Organizer donated by Clip It Up $80.00
A Surprise Say it With Letters piece from Deb Approx $7-$15. Here is an example that has been altered. The Sky is the limit with these wonderful blank pieces.
http://taylordconcepts.blogspot.com/2010/12/most-wonderful-time-of-year.html#comment-form
A little Bakers Twine assortment, Bow Easy and more from Really Reasonable Ribbon Over $30. These are some of my favorite ribbons Bonnie carries. http://taylordconcepts.blogspot.com/2010/12/most-wonderful-time-of-year.html#comment-form
Are ya getting excited yet??? Visit
A PSA Essentials Prize consisting of 1 Custom Stamp, 5 Peel and Stick Pads, 2 Inks and 1 Alignment Tool Valued at $150.00 (make sure to follow the PSA Stamp Camp Blog too). The possibilities with this stamping system are endless. Thank you Libby!!!
Holy Cannolli is All I've gotta say. And there is more. So So So Much More!!!
3 Amazing packages from Nikki Sivils, including papers from the Something for Everyone, Happy Holly-days and Tree Love lines as well as embellishments and Chipboard Albums!!! This package is HUGE!!!
This is just amazing. Look at all that Nikki Sivils Goodness!!!
My Favorite Glue EVER. Tracy from Helmar is throwing in 1 tube of Heaven in a Tube aka Liquid Scrap Dots, 6 packs of Zapdots, 1 bottle of Gemstone Glue and a bottle of Premium Craft Glue.
Gluey Goodness at its BEST. I think I'm starting to vibrate, I'm so stinkin excited for all of you!!!
My Favorite goodies from Gauche Alchemy. Some Punchinella and a Pink Parts bag of goodness. These goodies are the perfect addition to any Mixed Media Maven's arsenal!!!
http://taylordconcepts.blogspot.com/2010/12/most-wonderful-time-of-year.html#comment-form
Patricia is giving a wonderful assortment. If you love a little extra sparkle on your projects, this one will WOW ya. My Favorite Paper Pack from Paper Temptress: True's Favorites.
http://taylordconcepts.blogspot.com/2010/12/most-wonderful-time-of-year.html#comment-form
Crystle from Magistical Memories is giving a $30 Gift Certificate for some Chipboard and Acrylic Fabulousness!!!Best darn chipboard and acrylic out there!
Becky, a dear friend and owner of Scrap-Tastic is giving a gorgeous box of crafty deliciousness
A super YUMMO Grab Box of Embellishments from Frantic Stamper. I so love shopping here!!(swoon)
The Whimsical girl in me loves Kiki Art. A colorful and heartfelt Prize Pack from Kiki Art
Can't forget some Tattered Angels Goodness from Rachel YUM YUM YUM!!! If only this stuff was edible...pondering
Goodies from heArt of Scrapbooking (thank you Debby) Check out Debby's Blog to for some Christmas Cheer.
A Digital Image from Shannon at Bombshell Stamps. Gosh I miss you guys.
Now if that weren't enough already, I'm throwing in a huge assortment of crafty goodness. The pile was so big I had to take more than one photo. A Scor-It Mini, Prisma cardstock, Asian bookmarks, brads, bling, stamps galore!!! You name it, it's probably in here
http://taylordconcepts.blogspot.com/2010/12/most-wonderful-time-of-year.html#comment-form
HUGE I TELL YA!! HUGE!!!!!!
I see Basic Grey, DCWV, Glitz Rollers...
Sassafrass, Hambly, and Sweet Tierney
Is that Studio G Stamps I see???
Buzz and Bloom Jillibean and Magistical Memories. And I forgot to take pictures of the chipboard assortment. Some Maya Road, Little Yellow Bicycle and other pieces too!!!
Now I tried to total everything up to give you a ballpark figure and that came to about $900 worth of Crafty Heaven. THUD!!! Yup you read that right. And ALL of it will be given away to my friends and followers.
So here are the rules, gotta have a few of them. Please become a follower of my blog and leave a comment on this post. Tell all of your friends and post this blog candy on your Blog, Facebook page and/or Twitter. The post will stay at the top of my blog until January 5th. I will select winners using Random.org and post them the week of January 10th.
Isn't this absolutely AMAZING!!! Now leave that comment, tell your friends, post on your blogs and please become a follower.
With lots of love
http://taylordconcepts.blogspot.com/2010/12/most-wonderful-time-of-year.html#comment-form
Thursday, June 17, 2010
Fruit Salsa with Homemade Cinnamon Chips

Fruit Salsa with Homemade Cinnamon Chips
Prep Time: 45 minutes
Fruit Salsa
2 kiwis, peeled and diced
2 Golden Delicious apples - peeled, cored and diced
1 fresh ripe mango, diced into 1/4" chunks
1 pound fresh strawberries
1 tablespoon white granulated sugar
1 tablespoon brown sugar
3 tablespoons fruit preserves, any flavor
Cinnamon Chips
10 (10 inch) flour tortillas
butter flavored cooking spray
2 cups white granulated sugar
2-3 teaspoons ground cinnamon
Instructions:
Step 1: Preheat oven to 350 degrees.
Step 2: In a small bowl, mix together 2 cups granulated sugar and 2-3 teaspoons ground cinnamon.
Step 3: Spray a flour tortilla evenly with butter flavored cooking spray. Cut each into 8 wedges and place them in a single layer on a large cookie or baking sheet. Sprinkle the wedges evenly with the cinnamon sugar. Spray each wedge again lightly to set the sugar in place.
You can do two pans at a time to make this go faster. Fill them up as close together as you can before sprinkling the cinnamon sugar on them.Bake for 8-10 minutes until lightly brown. Remove from the oven and let them cool 5 minutes in the pan and transfer them to a platter or plate to finish cooling for another 10 minutes.
Step 4: While the first batch of tortillas are baking, begin cutting up each of the fruits as noted above. In a large bowl, combine the chopped kiwi fruit, apples, mango, and strawberries, white sugar, brown sugar and fruit preserves or jam. Cover and chill in the refrigerator for 15 minutes or more.
Step 5: Finish all of the tortillas in the same manner as step 3. By starting the cinnamon chips first and preparing your fruit salsa while the chips are baking you can cut down the amount of time this recipe will take to prepare.
To Serve: Place the salsa in a serving bowl and center it on a large platter. Arrange the chips around the outer edge of the platter and serve.
Serves 8-12 people.
Monday, May 10, 2010
Digital Scapbooking Sites
I have had this list for awhile but some might work and some might now. Enjoy
http://brandibarnes.typepad.com/there_goes_my_life
http://censloft.blogspot.com
http://criandokits.blogspot.com/
http://designsbystacie.com/blog/?p=134
http://digiscrapbook.blogspot.com
http://digishoptalk.com/boards/showthread.php?t=67646
http://digitalfreebies.com/freebies.php
http://digitalpinay.blogspot.com
http://digitalscrapspspfulladdiction.blogspot.com/
http://gypsycouturebylisamarie.wordpress.com
http://heathermanning.wordpress.com/
http://heavenlydesignz.blogspot.com
http://hm-scraps.blogspot.com
http://janoschsscrapblog.blogspot.com
http://jen-at-chaos-lounge.blogspot.com/
http://jessicagornydesigns.blogspot.com
http://jilld-zines.blogspot.com
http://juliaspages.blogspot.com/
http://juliavanderwerf.blogspot.com
http://karelsblog.homestead.com/
http://kimbsdesigns.blogspot.com
http://kjoistudios.blogspot.com/
http://lela20.blogspot.com
http://letsscrap-theblog.blogspot.com
http://lindsayjanedesigns.blogspot.com
http://lisamajewski.blogspot.com/
http://lorrisscrapsandmore.blogspot.com
http://mandykoontz.blogspot.com
http://manu70.blogspot.com
http://meine-wunderwelt.blogspot.com
http://melothria.blogspot.com
http://melusine-memories.blogspot.com
http://mollynmax.blogspot.com
http://nanas-attic.blogspot.com
http://nanibouelle.blogspot.com
http://nathylilblog.blogspot.com
http://nbk-nicnic.blogspot.com
http://neverlandscraps.blogspot.com
http://nursesdesigns.blogspot.com/
http://nwfotobug.blogspot.com
http://oyurieagalera.blogspot.com
http://papierstudio.blogspot.com
http://pictures-by-drehi.blogspot.com
http://piratesandpixies.typepad.com/piratesandpixies
http://plumtuckered.wordpress.com
http://princesspamela.typepad.com/my_weblog
http://priscillarocha.blogspot.com
http://punkyspixels.blogspot.com
http://redjuscrap.blogspot.com
http://sandraboddingtondesigns.com/archives/2007/07/a_sas_for_this.html
http://sarah172.blogspot.com
http://scrap-a-lot.blogspot.com
http://scrapbookargentina.blogspot.com
http://scrap-hobby.blogspot.com
http://scrapleaps.typepad.com/scrap_leaps
http://scrappinbikerchick.wordpress.com
http://scrappinhillbilly.blogspot.com
http://scrappinidgie.blogspot.com
http://scrappinstuffwithsooze.blogspot.com
http://scrapshambles.blogspot.com
http://scrapyourartout.wordpress.com
http://scrapzbypimptress.blogspot.com
http://scrapzonebygabi.blogspot.com
http://seebeesfreebies.blogspot.com
http://selanasscrapwelt.myblog.de/
http://simonecreations.spaces.live.com/Blog/
http://simplyyin.blogspot.com/
http://sindiegosscraps.blogspot.com/
http://sjwrightcreations.blogspot.com
http://sketchmeifyoucan.blogspot.com
http://smiekeltjewordpresscom.wordpress.com
http://sunshinedigiscraps.blogspot.com
http://tempsplace.blogspot.com/
http://virbrandi.com/
http://wetfishscraps.blogspot.com
http://wonderfulwasteoftime.blogspot.com
http://works-by-isyndra.de/
http://brandibarnes.typepad.com/there_goes_my_life
http://censloft.blogspot.com
http://criandokits.blogspot.com/
http://designsbystacie.com/blog/?p=134
http://digiscrapbook.blogspot.com
http://digishoptalk.com/boards/showthread.php?t=67646
http://digitalfreebies.com/freebies.php
http://digitalpinay.blogspot.com
http://digitalscrapspspfulladdiction.blogspot.com/
http://gypsycouturebylisamarie.wordpress.com
http://heathermanning.wordpress.com/
http://heavenlydesignz.blogspot.com
http://hm-scraps.blogspot.com
http://janoschsscrapblog.blogspot.com
http://jen-at-chaos-lounge.blogspot.com/
http://jessicagornydesigns.blogspot.com
http://jilld-zines.blogspot.com
http://juliaspages.blogspot.com/
http://juliavanderwerf.blogspot.com
http://karelsblog.homestead.com/
http://kimbsdesigns.blogspot.com
http://kjoistudios.blogspot.com/
http://lela20.blogspot.com
http://letsscrap-theblog.blogspot.com
http://lindsayjanedesigns.blogspot.com
http://lisamajewski.blogspot.com/
http://lorrisscrapsandmore.blogspot.com
http://mandykoontz.blogspot.com
http://manu70.blogspot.com
http://meine-wunderwelt.blogspot.com
http://melothria.blogspot.com
http://melusine-memories.blogspot.com
http://mollynmax.blogspot.com
http://nanas-attic.blogspot.com
http://nanibouelle.blogspot.com
http://nathylilblog.blogspot.com
http://nbk-nicnic.blogspot.com
http://neverlandscraps.blogspot.com
http://nursesdesigns.blogspot.com/
http://nwfotobug.blogspot.com
http://oyurieagalera.blogspot.com
http://papierstudio.blogspot.com
http://pictures-by-drehi.blogspot.com
http://piratesandpixies.typepad.com/piratesandpixies
http://plumtuckered.wordpress.com
http://princesspamela.typepad.com/my_weblog
http://priscillarocha.blogspot.com
http://punkyspixels.blogspot.com
http://redjuscrap.blogspot.com
http://sandraboddingtondesigns.com/archives/2007/07/a_sas_for_this.html
http://sarah172.blogspot.com
http://scrap-a-lot.blogspot.com
http://scrapbookargentina.blogspot.com
http://scrap-hobby.blogspot.com
http://scrapleaps.typepad.com/scrap_leaps
http://scrappinbikerchick.wordpress.com
http://scrappinhillbilly.blogspot.com
http://scrappinidgie.blogspot.com
http://scrappinstuffwithsooze.blogspot.com
http://scrapshambles.blogspot.com
http://scrapyourartout.wordpress.com
http://scrapzbypimptress.blogspot.com
http://scrapzonebygabi.blogspot.com
http://seebeesfreebies.blogspot.com
http://selanasscrapwelt.myblog.de/
http://simonecreations.spaces.live.com/Blog/
http://simplyyin.blogspot.com/
http://sindiegosscraps.blogspot.com/
http://sjwrightcreations.blogspot.com
http://sketchmeifyoucan.blogspot.com
http://smiekeltjewordpresscom.wordpress.com
http://sunshinedigiscraps.blogspot.com
http://tempsplace.blogspot.com/
http://virbrandi.com/
http://wetfishscraps.blogspot.com
http://wonderfulwasteoftime.blogspot.com
http://works-by-isyndra.de/
Cake Like Brownies

BROWNIES (CAKE TYPE)
1/2 c. cocoa
1/2 c. boiling water
1/2 c. butter
1/2 c. lard
2 c. sugar
3 eggs
2 c. flour
1/2 c. milk
1 tsp. vanilla
1 c. broken nuts Optional
Mix cocoa and boiling water and let cool. Cream butter, lard and sugar. Add eggs, 1 at a time and beat until fluffy. Sift flour and add alternately with milk with vanilla added. Add cocoa mixture and nuts.
Bake at 350 degrees for 40 minutes in a 10"x15" greased pan.
Thursday, April 29, 2010
Carrot Cake with Pineapple and Coconut

Carrot Cake with Pineapple and Coconut
3/4 pound carrots, peeled and finely grated
8 oz. can pineapple tidbits or crushed, drained
2 C (8.8 oz.) unbleached all purpose flour
2 tsp baking powder
1 tsp baking soda
1/2 tsp salt
1 tsp cinnamon
1/2 tsp nutmeg
1/8 tsp clove or allspice
1/2 C brown sugar
3/4 C granulated sugar
4 large eggs
1/2 C (4 oz.) unsalted butter, melted and cooled
1/2 C canola or vegetable oil
Cream Cheese Frosting
Approximately 1 C toasted, shredded and sweetened coconut to decorate the outside, optional
Preheat the oven to 350 degrees. Butter and flour 2 8 inch cake pans. A 9 inch cake pan would also work but baking time will be shorter.
Add the drained pineapple to the shredded carrots and set aside.
In a blender, add the 4 eggs, brown sugar, and granulated sugar. Blend on a low speed for a minute. Slowly drizzle in the melted butter and oil and blend for 4 more minutes.
Meanwhile, in a large mixing bowl, whisk together the flour, baking powder, baking soda, salt, and spices. After the liquid mixture has finished blending, pour the blender contents into the dry ingredients, add the grated carrots and pineapple, and gently fold the batter with a rubber spatula until no streaks of flour or chunks of carrots remain.
Pour the batter evenly between the two cake pans and bake at 350 for 30 – 35 minutes or until a skewer inserted in the center of the cake comes out clean. Start checking the cake after 25 minutes.
The completed cake before going into the fridge. Breakfast the next day.
This frosting is absolutely magnificent. Like pineapple and coconut, browned butter and rum is one of those combinations that just works. This is a great all purpose frosting and can be used for other cakes, not just carrot cake. After browning the butter, the milk solids can be strained out for a clean looking frosting but I like the freckled look. The specks of milk solids also camouflages any cake crumbs that falls into the frosting, something I appreciated as I was frosting a cake in a sleep deprived state at 11pm.
Brown Butter Rum Cream Cheese Frosting
Enough to fill and frost an 8 inch 2 layer cake, but easily doubled
4 oz. cream cheese
4 oz. or 1 stick unsalted butter
2 1/2 – 3 C powdered sugar, sifted
2 - 3 Tbsp dark rum
Have a heat proof bowl resting in an ice bath ready.
In a small saucepan, melt the butter medium low heat. Cook the butter slowly and stir occasionally. First it will look like melted butter, then it will start to bubble and sizzle, and after a while it will start to clear and the milk solids will start to separate out of the fat. Slowly the solids will turn golden and then a light golden brown and the butter will smell nutty and caramely. When this happens, take the off heat and pour it into the bowl in the ice bath to cool it down quickly. If you let it sit, it solids will continue to cook and may burn.
Cool the butter to room temperature. Meanwhile, take the cream cheese out and bring it to room temperature.
After the butter has cooled, beat the cream cheese and 1 cup of the powdered sugar. Slowly drizzle in the melted butter and add another cup of powdered sugar. Add more sugar according to your tastes. I added 3 cups of powdered sugar total and the frosting was the tiniest bit grainy at that point but it wasn’t a deal breaker. Next time I'll stop with 2 1/2 cups. Slowly drizzle in rum to your tastes, starting with 1 tablespoon. I like my frostings on the boozy side but too much liquor and the frosting will be too runny. A good rule of thumb is 1 tablespoon of liquor for every cup of powdered sugar you add. Continue beating the frosting until it is fluffy and pillowy. It will have a consistency similar to whipped cream but have more structure.
Wednesday, April 28, 2010
Asian Noodle Salad


SALAD INGREDIENTS:
1 packages linguine noodles, cooked, rinsed, and cooled (tossed in Olive Oil so they don't clump)
1/2 to 1 head sliced Napa cabbage
1/2 to 1 head sliced purple cabbage
1/2 to 1 bag baby spinach
1 red bell pepper, sliced thin
1 yellow bell pepper, sliced thin
1 orange bell pepper, sliced thin
1 small bag bean sprouts (also called “mung bean sprouts”)
3 sliced green onion
3 peeled, sliced cucumbers
2 bunches of chopped cilantro
1 9oz. can whole cashews, toasted
8 oz. Crumbled Feta cheese (don't leave this out)
DRESSING:
Juice of 3 lime
1/2 cup olive oil
2 1/2 tablespoons sesame oil
2/3 cup soy sauce
1/3 cup brown sugar
3 tablespoons fresh ginger, chopped
3 cloves chopped garlic
2 jalapenos, seeded and chopped (opt)
1 bunch chopped cilantro
Directions:
Mix together salad ingredients. Leaving toasted cashews right before serving. Whisk together dressing ingredients and pour over salad. (you can strain dressing so you don't get chunks) Mix with tongs or hands and serve on platter.*Dressing keeps up to three days before serving, WITHOUT cilantro.
Friday, April 23, 2010
Friday, April 16, 2010
Toffee Blondies

Toffee Blondies
(adapted from Everyday Food)
1/2 c. (1 stick) butter, melted
1 c packed light brown sugar (I've used a combo of dark & light, too)
2 large eggs
1 tsp vanilla (the first time I made these, I was out of vanilla...the horror!...so I used almond extract. I've made them that way ever since)
1/4 tsp salt
1 & 1/2 c flour
1 c toffee bits (this time I could only find the chocolate covered toffee bits, both taste great, but I think the plain ones make for prettier blondies.)
Preheat oven to 350. Line the bottom and side of an 8 inch square pan with foil, leaving an overhang on 2 sides.
Cream butter and brown sugar together until smooth. Beat in eggs, vanilla and salt, scraping down sides.
Add the flour on low speed until combined. Stir in toffee bits.
Spread batter into prepared pan (an offset spatula helps). Bake until a toothpick inserted in the center comes out clean, about 30 to 35 minutes. Let cool completely in pan.
Lift the blondies out of the pan using the foil overhang. Cut with a bench scraper or serrated knife.
Delicious!!!
Thursday, April 15, 2010
Colorful Cake

Cake Recipe
Set all your ingredients out the night before so that they are all at about 70 degrees.
INGREDIENTS
1 cup butter (2 sticks)
2 cups sugar
4 eggs
1 teaspoon vanilla
1 teaspoon lemon extract, optional
1 tablespoon lemon zest (from one lemon), optional
3 cups cake flour
4 teaspoons baking powder
1/2 teaspoon salt
1 1/2 cups milk
Food coloring (I used one package of the four basic colors, including red, blue, yellow, and green, and one package of the 'neon' colors, including purple, pink, turquoise, and lime)
FOR THE FROSTING
Two 8 oz packages cream cheese
1/2 cup butter, softened to room temperature
2 cups sifted confectioners' sugar
1 teaspoon vanilla extract
1 teaspoon lemon extract (optional)
DIRECTIONS
1. Preheat oven to 375 degrees
2. Generously grease and flour your pans
3. Cream 1 cup butter and 2 cups sugar until fluffy. Cream until fluffy; Add 4 eggs. (You can also separate the eggs, and only use the whites. If you do this, beat the egg whites until stiff, but not dry and fold them in after all the dry ingredients have been added.) Then add 1 teaspoon vanilla, 1 teaspoon lemon extract (optional), and 1 tablespoon lemon zest (grated peel of one lemon - optional)
4. In a separate bowl, sift together 3 cups of sifted-before measured cake flour (general all-purpose white flour works fine), 4 teaspoons baking powder, and a 1/2 teaspoon salt.
5. Add the dry ingredients to the butter mixture, alternating with the milk. Stir the batter until smooth after each addition.
6. Have a bowl for each baking pan you will be making in this batch. I made seven layers from this recipe, so I put one cup of batter in each bowl. I was a little short by the time I got to the last bowl, so I just scooped some out of each to even them up.
7. Add your food coloring to each bowl. For this cake, I used 1/2 teaspoon of color per bowl, just to get an idea of how intense the colors come out with a measured amount. I left one bowl empty until after I had stirred the others, so that I could decide what I wanted to use for the last color. I decided on pink, then mistakenly used the red. Bother. Since I already had red, I added purple to one red, which resulted in the deep cranberry color. You really can't make a mistake on the colors.
8. Put the batter from each bowl into one of your greased and floured pans. They should fill up to about 1/4" below the top of the pan. Pick the pans up by their sides, holding them level, and tap them on the table to get any bubbles of air up.
9. Bake in a pre-heated 375 degree oven for 18-22 minutes. A toothpick should come out clean, and the edges should be pulling away from the sides of the pan. It's better to err a bit on the overcooked than the undercooked, because a too moist cake will not be as firm. Remember not to open your oven door until at least 15 minutes have passed; the cold air can make the cakes fall.
10. Let the cakes cool in their pans for about 15 minutes, until they are just slightly warm, and easy to handle. Turn them out to cool onto racks.
Cakes naturally bake with a bit of a dome. Once you've taken them out of their pans and they are completely cool, use a long serrated bread knife to slice this off this dome so that you have a relatively flat surface on both sides of each layer.
Arranging the Colors
1. Decide what order you want your colors in, and set them out.
2. While the cakes are cooling, make your frosting. This recipe makes more than enough to frost 7 layers. You will need to multiply it for more layers.
FROSTING DIRECTIONS
1. Cream together the 2 packages of cream cheese and 1/2 cup butter until well mixed and creamy.
2. Add one teaspoon each of vanilla and lemon extract, and mix until smooth.
3. Gradually stir in the 2 cups of confectioners' sugar.
4. Frost the top of each layer and stack them as you wish, in stacks of about four.
6. Refrigerate for a couple hours so that the cake and frosting can set. The cake layers will be more likely to retain their shape in a vertical position if the layers with frosting have had this time to chill.
Assembling the Cake
1. Lay out some waxed paper -- making a space in the center for your cake. You will be removing this paper after you've frosted the outside of the cake (and any mess you made).
2. Lay down three pieces of red or black licorice a couple inches apart on your platter. Put two pieces on the bottom, and one more piece to make a triangular wedge. This will help hold the layers vertical.
3. Take your chilled and top-frosted layer stacks out of the refrigerator. Pick them up as stacks. Set the stacks vertically on the platter, holding the groups already down steady while you continue to add stacks until all the layers are down.
4. Frost the outside of the cake, and the unfrosted end. Add whatever decorations you want...get out the knife, and dig in!
Sunday, April 11, 2010
Chocolate Chip Cookie Dough Brownies
1 box original Marie Callenders brownie mix (with chocolate pouch)
1 pouch Marie Callenders Chocolate Chip Cookie Mix
12 oz. semisweet chocolate (I used Baker's SEMISWEET squares)
3/4 c. heavy cream
6 TBSP butter
1/2 tsp vanilla
Preheat oven to 350. Grease the bottom only of a 9 x 13" pan.
Prepare the brownie mix as directed. Pour into prepared pan. Set aside.
Prepare the cookie dough as directed.
Drop the cookie dough by rounded tablespoons onto the brownie batter and press down slightly.
Bake for 35-40 minutes, until a toothpick comes out almost clean. Cool completely on a wire rack.
Optional: For the ganache:
Chop the chocolate (or use chocolate chips). Heat the cream and butter just until it begins to simmer. Pour over the chopped chocolate. Let stand 5 minutes, then stir until smooth. Stir in the vanilla.
{I could dive head first right into this.}
Pour the ganache over the cooled brownies, spread and let stand until the ganache has set. Cut with a bench scraper and devour!
Subscribe to:
Posts (Atom)